So you’ve decided to take the quilting tools, congratulations! Welcome to the wonderful world of quilting. It’s an incredibly rewarding and fulfilling hobby, but with so many tools and supplies available, it can feel a bit overwhelming. What equipment and materials do you really need to get started? What’s just a nice-to-have? Let’s dive in and explore the essential best quilting tools to set you up for success.
I’ve categorized the various quilting tools and supplies into three tiers:


Must-Haves: These are the essential, foundational items. Without these, the quilting process will be significantly more difficult, or in some cases, you may even be unable to complete certain steps. These are the tools you’ll want to acquire first.
The really useful to haves: These items aren’t absolutely essential, but they’ll make your quilting experience much easier and more efficient. While not mandatory, they’re highly recommended to have in your quilting toolkit.
The wonderful to haves: These are more supplementary, non-essential items that can enhance your quilting enjoyment and process, but aren’t necessarily required to get the job done. They’re valuable additions, but you can certainly quilt successfully without them.
Overall, the “must haves” tools are truly essential for making a quilt, while the other tiers of tools can make the quilting process easier and more efficient. If your budget allows, investing in quality tools upfront will save you time and frustration in the long run, and help you create a beautiful, long-lasting quilt.
Some of the links provided here are to my personal favorite quilting shops, but where those aren’t available, I’ve included Amazon links as alternatives. As an Amazon Associate, I may earn a small commission from qualifying purchases made through those links – thank you in advance for your support!
Identifying these tiers of essential, highly useful, and nice-to-have quilting tools and supplies will help you prioritize your investments as you build out your quilting toolkit. Starting with the must-have foundational items will set you up for quilting success, while selectively adding the other recommended tools over time can enhance your quilting experience.
Must haves:
Some quilters are die-hard hand stitchers through and through. But let me tell you, investing in a good sewing machine is going to make your life so much easier. Now, you don’t need to splurge on some top-of-the-line fancy model. Heck, I made tons of my best quilts on a little Brother machine I got for around $150. Worked like a charm. In fact, let me run down the three sewing machines I’ve used over the years.
They all had their strengths, but the ones that really stood out had a straight stitch, a zigzag stitch, and the ability to adjust the stitch length and tension. Those features gave me way more flexibility and control when I was piecing my quilt tops together. So if your budget allows, I’d definitely recommend looking for a machine with those capabilities.
Thread:
(Sewing machine thread) As for the thread, I’d say use the best quality your budget allows. Personally, I’m a big fan of Aurifil and this Sew for Good Organic thread – the quality is just top-notch. But you know, I’ve also had great results sewing up quilts with those 10 spools for $10 thread packs, and it’s been totally fine. The only thing I can’t guarantee is how long that cheaper stuff will hold up over time. So if you can swing it, I’d recommend investing in some higher quality thread. It’s worth it in the long run. Now, when it comes to colors, that’s totally up to your personal preference.
Me, I pretty much used white or cream thread for the majority of my quilting projects. It’s a great neutral that goes with just about anything. But you can definitely build up your color selection as you start to explore different fabrics and designs. Just have fun with it and don’t stress too much – the most important thing is that you’re creating something beautiful!
Rotary cutter and blades:
Got it, let’s talk more about rotary cutters! I know a lot of quilters start out asking the same thing – “Can’t I just use regular scissors?” And technically, yes, you can. But let me tell you, once you start using a rotary cutter, it’s going to make your life so much easier, not to mention more accurate.
Now, the most common size that the majority of quilters go for is the 45mm cutter. That’s been my go-to as well. I’ve honestly tried out all kinds of different cutters and blades over the years, and the 45mm OLFA is hands down my favorite. It’s the only one where the screw hasn’t loosened up on me, which is a big plus.
And the blades I swear by are the Scribbly Gum ones. They stay super sharp for ages, which is clutch. I mean, nothing worse than a dull blade when you’re trying to get precise, clean cuts on your fabric. So if you’re in the market for a rotary cutter setup, I’d highly recommend the 45mm OLFA with those Scribbly Gum blades. It’s an unbeatable combo in my experience.
Cutting mat:
You know, when it comes to cutting mats, I can’t stress enough how important it is to go as big as your budget will allow. An 18″ x 24″ mat is a great starting point because it’s the perfect size to fit a whole fat quarter. But if you can swing it, I’d really recommend trying to get your hands on an even larger one, like the 24″ x 36″ Fiskars mat.
Now, self-healing mats are definitely the way to go if you can find them. They just tend to last so much longer than the non-self-healing versions. But don’t stress if a self-healing one isn’t in the budget – a regular non-self-healing mat will still get the job done.
One thing I definitely don’t recommend though is getting a folding mat. I mean, sure, they’re great if you’re really short on storage space. But they never lie completely flat, you know? And whenever you try to cut over the seams, it just doesn’t work as cleanly. So much more annoying than it’s worth, in my opinion.
Anyways, my personal favorite cutting mat is the Fiskars 18″ x 24″ – it’s self-healing and gives me plenty of room to work. But if you can fit it, the 24″ x 36″ Fiskars is also amazing. Either way, a good cutting mat is an essential investment that’s going to protect your work surface and help you make super precise cuts. So don’t skimp on this one!
Big Quilting ruler:
You’re absolutely right, having the right rulers is essential for cutting your fabric quickly and accurately. If you’re just starting out and can only get one ruler, I’d definitely recommend going for one that’s around 24 inches by 6.5 or 8.5 inches.
The great thing about a ruler in that size range is that it gives you the versatility to cut both larger pieces and smaller strips. You know, those bigger pieces for the quilt top, as well as the narrower strips you might need for binding or other details.
And when it comes to my personal favorite, I have to give a shoutout to the Creative Grids rulers. The lines are just so clear and crisp, and they have these little non-slip pads on the back that keep the ruler from sliding around on you while you’re cutting. Makes a huge difference in getting those precise, straight cuts.
So if you’re looking to invest in one essential quilting ruler, I’d highly recommend going for something in that 24-inch range, with a width of 6.5 or 8.5 inches. It’ll give you the versatility you need to tackle all kinds of cutting tasks as you’re piecing your quilts together. And the Creative Grids ones are definitely top-notch in my experience.
Basting Spray OR Basting Pins:
When it comes to basting your quilt sandwich, you really have two main options – basting spray or basting pins. Personally, I prefer the basting spray. It’s just so much faster and in my opinion, it leads to a better overall result. The adhesive helps everything stick together seamlessly.
The only downside is that the basting spray comes in an aerosol can, which I know some quilters aren’t crazy about. On the other hand, the basting pins take a bit more time and effort, but they are more cost-effective in the long run since you can reuse them over and over again.
At the end of the day, it really comes down to personal preference. Either method will get the job done and allow you to securely attach your quilt top, batting, and backing. But if speed and efficiency are priorities for you, I’d definitely recommend giving the basting spray a try. It’s been a total game-changer for me.
Seam ripper / Quick-unpick: Yes, you will sew the wrong piece of fabric to the other piece… or sew it on really crooked. Some mistakes can definitely be left there (“finished is better than perfect”), but some just need to be fixed.
Little fabric scissors/ snippers: To trim all your threads, I’d recommend having a few pairs of scissors (though more than one is more of a nice-to-have). It’s convenient to keep one with your machine, maybe one with your hand sewing kit, etc.
Iron and Ironing Board Iron:
Ironing is a super important step in quilting—but if you’re a clothes ironing hater like me, don’t let this turn you off. I don’t mind quilting ironing and despise clothes ironing! An iron helps with pressing seams, ensuring that the fabric lies flat, setting the stitches, and making the pieces more accurate. Your regular iron will work just perfectly, but if you get really into quilting, I love my Oliso (it has little legs so you don’t have to tip it up after you’ve used it!).
The really useful to haves:
Sewing machine paraphenalia
I started on a basic Brother machine, but once I got into quilting I had to upgrade – twice! However, if you want to get into quilting without buying a new machine, whether it’s not in the budget or you’re unsure if it’s for you, there are some affordable tools that can help.
These simple additions to your sewing setup can have you quilting like a pro.
1/4 inch seam foot for your sewing machine:
One of the best sewing machine accessories I’ve discovered for quilting is the 1/4 inch seam foot. Quilting seams are generally 1/4 inch, so having a foot that can help you maintain that perfect quarter-inch width makes a huge difference.
It’s not an essential tool, but if you can get your hands on a 1/4 inch seam foot – sometimes they come included with sewing machines, but you can also buy them separately – it will make keeping your seams consistent so much easier. And that consistency is key for a really neat, well-constructed quilt.
When I upgraded my own machine, I was amazed to discover this little foot. It has a small barrier or guide on the side that keeps your fabric perfectly spaced at 1/4 inch as you sew. It made my stitching so much more accurate, not to mention just easier overall. No more guessing or trying to eyeball that 1/4 inch!
For those of you who haven’t seen one of these 1/4 inch seam feet before, it’s a super handy little attachment that can take your quilting to the next level. Definitely worth looking into, in my experience.
Guide bar:
Imagine you’re sewing a quilt. You want those straight lines, but who wants to spend time marking them all out? That’s where a quilting guide bar comes in! It’s like a little helper that attaches to your sewing machine foot. As you feed your fabric through, the guide bar keeps your stitching lines perfectly spaced apart, without you needing to measure or mark anything. It’s a real time-saver, and it helps you get those beautiful, even stitches every time.
Walking foot:
You know how sometimes you’re sewing through a bunch of layers, like when you’re quilting, and the fabric just wants to bunch up? A walking foot is like a little superhero for that! It’s a special foot that attaches to your sewing machine and helps to feed all those layers of fabric evenly, so they don’t get bunched up or pulled out of place.
Other tools
Other quilting ruler:
You know how those tiny squares and little shapes can be a pain to cut with just your big ruler? Well, a smaller quilting ruler, like a 4.5″ x 4.5″ or a 6.5″ x 6.5″, is a real game-changer! It makes cutting those little pieces a breeze, and it’s perfect for trimming up those wonky shapes.
If you’re only going to add one more ruler to your collection, I’d say go for the 6.5″ x 6.5″ square. It’s super versatile! But hey, if you’re really serious about quilting, don’t be afraid to get a whole set of different sizes. You’ll be glad you did!
Fabric Scissors:
Alright, quilters, let’s talk about scissors! Now, if you’ve got a trusty rotary cutter, you might think you can skip the fabric scissors. But trust me, they’re still a good thing to have around!
I’m a big fan of these Sohmo scissors. They’re a bit pricey, but oh my goodness, they’re worth it! You know how your mom used to yell at you for cutting paper with her fabric scissors? Well, once you get a pair of your own, you’ll understand why! They’re sharp, they cut like butter, and they’ll make your quilting life so much easier.
Hand quilting needle and thread: If you’re planning on hand quilting or hand binding, then you absolutely need a good hand quilting needle and thread. They’re essential tools for those beautiful, hand-stitched details.
The wonderful to haves
As a master quilter with decades of experience under my belt. Let me share my thoughts on the various quilting tools you mentioned:
Pins: – I absolutely swear by pins! They are an essential part of my quilting toolkit. I always use long, sturdy pins that can securely hold multiple layers of fabric together. Pinning is crucial for keeping your pieces aligned and preventing any shifting or distortion as you sew.
Wool Ironing Mat: – This is one of my favorite quilting tools! The wool surface is ideal for pressing seams and getting that lovely, crisp finish on your blocks. The natural heat conductivity and moisture absorption of wool make it far superior to a regular ironing board. I find it helps me achieve beautifully flat, set seams every time.
Tailor’s Clapper: – This wooden pressing tool is a real game-changer! I use it to set seams, especially on tricky bias edges. The firm pressure of the clapper helps eliminate any puckering or warping, leaving you with clean, flat seams. It’s an indispensable tool for producing professional-looking quilt blocks.
Cluck Cluck Sew Diagonal Seam Tape: – What a brilliant little gadget! I use this all the time when making half-square triangles. It takes the guesswork out of cutting and sewing on the diagonal, ensuring perfectly accurate HSTs every single time. A real lifesaver for intricate quilting projects.
Quilting Gloves: – I’m a big fan of quilting gloves! They provide that extra bit of grip and control when maneuvering your quilt layers under the machine. I find they help me sew more smoothly and prevent any accidental slipping or puckering of the fabric.
Binding Clips: – These are a fantastic alternative to pins for securing your binding in place. They’re so much easier to use and won’t leave any annoying holes in your beautiful quilt. I always reach for my binding clips when it’s time to finish off a project.
Overall, these are all incredibly useful tools that I wouldn’t want to be without in my quilting studio. Each one serves a specific purpose and helps me create quilts of the highest quality. I highly recommend every single one of them to my fellow quilting enthusiasts!
Cusomers also read this:
How to make a fold and stitch wreath?

To make a fold and stitch wreath, you’ll need the following materials: Materials Needed: Two contrasting fabrics (dark and light) Heat and bond light or feather light interfacing Sewing machine…
Top 7 Best Sewing Machine For Free Motion Quilting Review

Having a hard time finding the best sewing machine for free-motion quilting? If so, keep your eyes on the screen and follow our post to find the best one for…
Top List For Best Ironing Board For Quilters In 2024
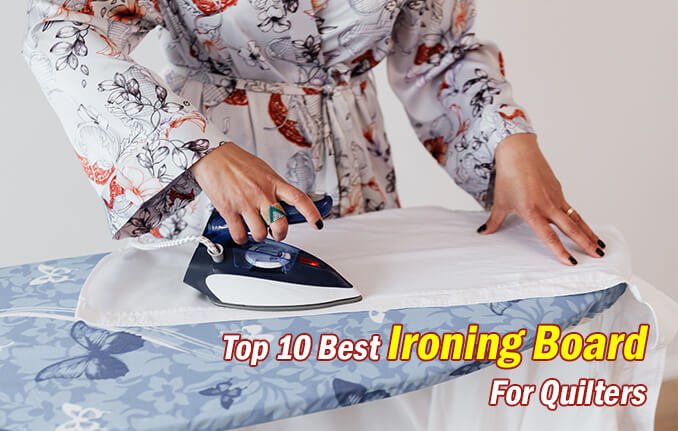
Some people consider ironing is a tedious daily chore, even for quilters. Therefore, a good ironing board can be a game-changer. An excellent ironing board for quilting can save you…
Best Quilting Pins: How to Choose the Best One?
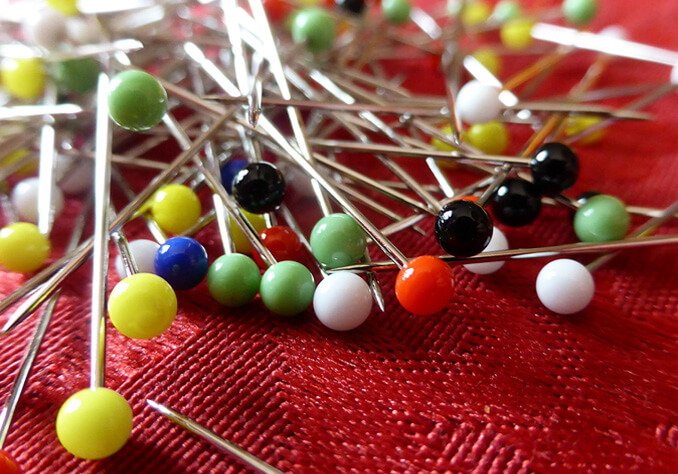
The best quilter needs the best quilting pins – yes, we are referring to you. Quality quilt pins are an essential part of a quilter’s arsenal, whether you just took…
Make Wonderful Crafts With Best Rotary Cutter For Quilting

Scissors can handle simple projects, but if your patchworks usually need cutting straight lines, the best rotary cutter for quilting could help your works become more convenient. These cutters can…
The Best Sewing Table For Quilting: Arrow is Ruling the Roost in 2024

The best sewing table for quilting can help you relieve the burden of not having any place to store essential sewing accessories. More importantly, it helps create an ideal workspace…
Best Quilting Scissors In 2024 – Cut Fabric With Ease

A decent pair of scissors plays an important role in any sewing project. If you own the best quilting scissors, you can easily glide through even the toughest fabrics like…
How To Use Quilting Stencils – Complete Guide For Beginners!

Let’s face it, the world of quilting may be somewhat perplexing for a novice. There always appears to be a slew of new approaches and tools that you need to…
A-Pro Quilter And How To Use Quilting Rulers Properly!
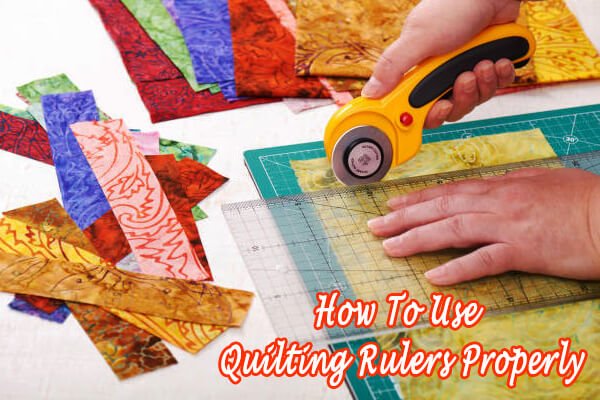
A quilting ruler is essential for achieving the best outcomes, regardless of your levels of quilting ability. These fast guides will teach you how to align your fabric along these…
How To Make An Ironing Pad For Quilting: Useful Tips For You!

Introduction Do you find it inconvenient to use an ironing board whenever you want to iron your clothes? The issue can be tackled well with a portable pad if you…
Explore my quilting journey. Click on each quilt to discover the intricate details.


Update on 6/27/2024